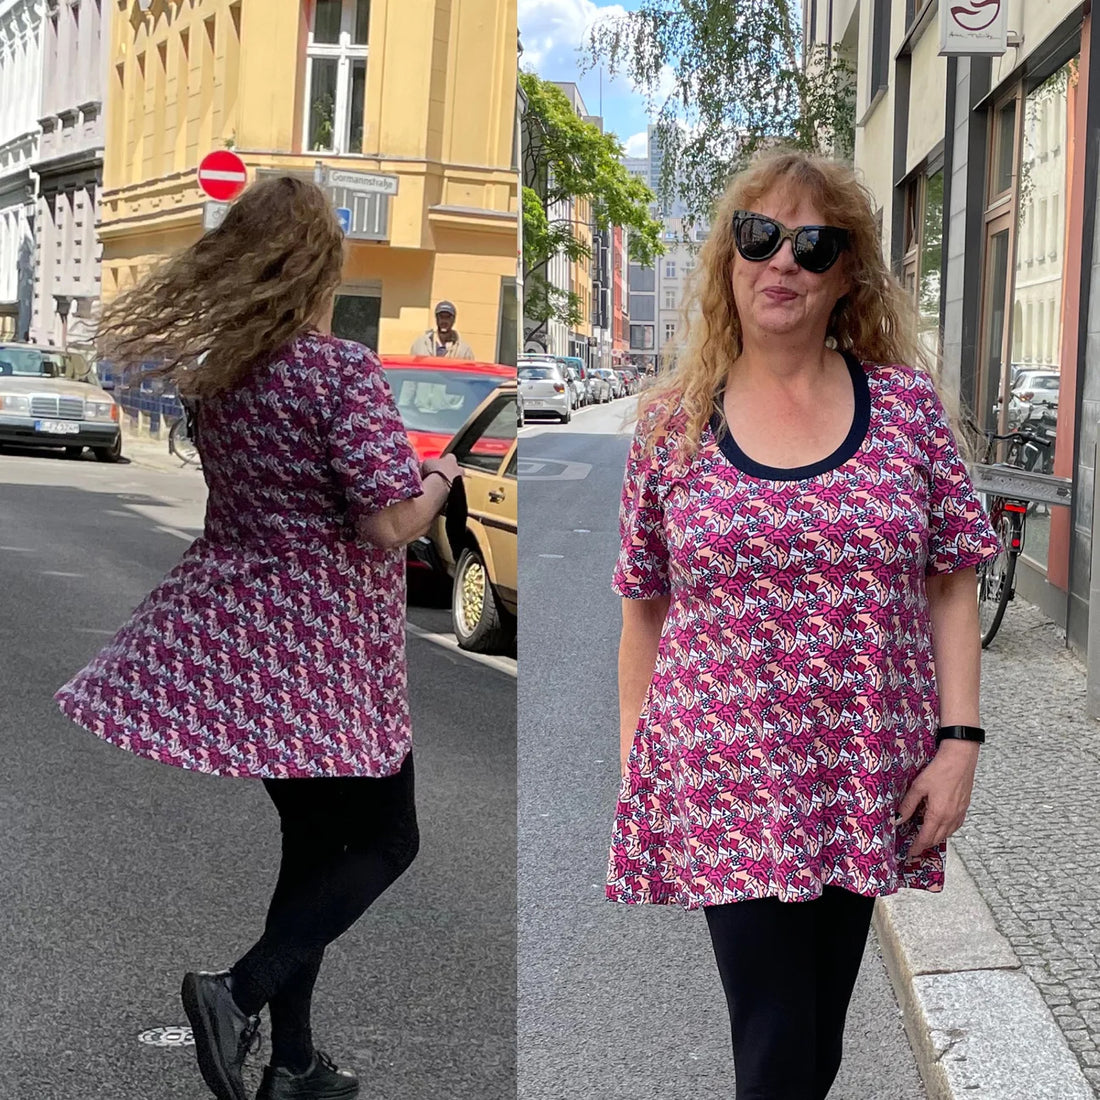

My friend Annette loves colourful swishy clothes and wanted a summer top.
She also prefers a nice scoop neckline.
The starting point for this fancy t-shirt was the Kim top.
Here are the steps behind this sweet Kim top customisation (hack).
1. Draw a new neckline. Make sure that the curved line is smooth from the front to the back piece Take into consideration the width of the rib band when you decide where the neckline should be.
2. Draw a slightly curved line across the back piece. The line in the photo is slightly above the waist. Add some balance points and make sure you have a right angle 90° at the centre back.This piece will be cut on the fold so you wont need the centre back seam allowance. It can be cut off.
3. Decide on the length and check that junction of the front and back seam is a straight line. The centre front and the centre back should also be a right angle 90°
Remember that you might want to hem the garment so don´t cut it too short.
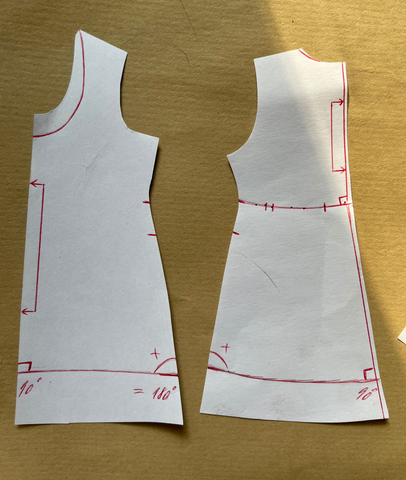
4. Mark the side seam on the front piece so the side seams will match up.
Add an extra balance point because you might also want to add pockets...
There is a sneaky dart at the bust level of the Kim so measure from the hem upwards.

5. Check that the pieces create a harmonious curve.

6. Here is a before and after photo. Separate the back.
The top back just needs the balance points transferred and seam allowance added onto the bottom edge.
7. Cut the lower back piece into 5 sections and add flair. You can add 5 cm* per section which will give you 40cm more width at the hem.
8. Add seam allowance and transfer the balance points onto the upper edge of the lower back piece.
* Feel free to add more if you would like it very swishy. **
** in this case a centre back seam might save cloth- so you will be happy that you have notches so that every piece ends up in the correct place.

1 comment
die Darstellung des Schnittmusterhacks ist wunderbar nachvollziehbar und von hohen didaktischen Wert. Danke für’s Teilen
———
Stokx Patterns replied:
Es freut mich sehr das eine Schnitt kann als eine Anfangspunkt benutzt werden. Es gibt auch eine andere post irgendwo…kim hack <https://stokx-patterns.com/products/online-course-puff-reach-sleeve> Ich trage diese stuck sehr gerne. Grüsse