
The starting point for this style was the Eve dress
This is a wedding dress was created for a ceremony, in a field ,on what would likely be a very hot day.
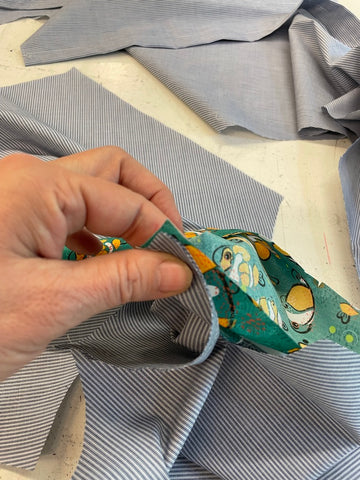
Lets start with a tip for constructing the back yoke which I call the
"Lazy Burrito" method.


Sew the inside and outside back yoke pieces to the centre back.
Then sew the shoulder seams, right side to right side, the fronts to the outside yoke.


The inside yoke shoulder seam can now be sewn by twisting the right side of the inside yoke to the wrong side of the front piece. Sew along the shoulder seam again, this time inside the 2 back yokes.
This will give you a lovely clean finish.

Then you can attach the collar.
The Eve Collar stand is easier than a "normal" stand collar. The inner and outer collar are sewn together and then the upper collar edge is sewn. When the collar is sewn to the neck edge, the outer collar wraps around to the inside creating a neat folded edge without the usual bulky seam.


Then the following changes were made to the original style.
1. I added a Puff Reach sleeve by adding fullness to the Reach sleeve and a partial elasticated casing at the upper arm.


We made a video about this.
Here is a link to the youtube video:
2. Added fullness to the skirt and lengthened the back a bit.

The photo below shows the fullness of the skirt from the side.
A bit* more fullness was added to the back sections of the skirt.
* about twice as much.

We also toyed with the idea of catching up the skirt either with ties or a vertical casing.**

3. Added a pseudo welt pocket.


And finished the pocket with a french seam.

Thank you to Anna for modeling this piece.... even if it was a little bit too big .
2 comments
Love the reimagined “Eve” dress, especially the faux welt pockets! (Any chance of an add-on pattern for the pockets?)
———
Stokx Patterns replied:
Have you seen the new side bar pocket?
Love the reimagined “Eve” dress, especially the faux welt pockets! (Any chance of an add-on pattern for the pockets?)