When I am working out how much fabric is needed for each style and size I always try to find the sweet spot which is fast and thrifty.
Laying all pieces up on the fold is fast because you can cut 2 pieces at once.
But is it thrifty? It depends on how you fold your cloth. Here are some techniques to take into consideration before you chop into your cloth.
Does one cut on the fold or not cut on the fold?
Is there another way? Absolutely!
For example:
A fold doesn´t have to be down the middle of the cloth. It can be just the width of the piece that needs to be a pair. Keep your fold parallel to the fabric edge so the grainline is accurate for both of your pair halves.
This is useful If you have one very long piece.
A very long piece.
Have a plan, don´t cut this piece last, it will probably go up one or both edges. Cut it first , then double up your fabric for the other pieces.

A fold doesn´t have to be lengthwise.
A horizontal fold will give you the whole width on which to arrange your pattern pieces.This fold should be at a right angle to the fabric edge so the grain line is consistent on both pair halves.
This is a useful technique when the pieces are wider than ½ the width of your cloth. Double up your cloth so you can cut these pieces together rather than separately.
This method is suitable for allover prints.
But a word of caution:
One way prints or fabrics with a nap will be upside down if you use this method!


Can a piece be doubled when it isn´t on the fold .
Yes, this is useful for one way fabrics.There is a sneaky way to cut a pair so that they are in the same direction. Mark up the one half of your pair, then chop around it. Then turn over the rest of the cloth; so it is facing downwards if it was previously right side up; then put the marked up piece on top and cut 2 halves of the pair at the same time.
Tip: With one way fabrics I always mark an arrow, top down , the way the fabric should be.


For Linen weave
If you have chosen a fabric that is the same horizontally and lengthwise,
( do a wash test to check if it shrinks evenly too) You can cut your pieces on the horizontal or vertical grain. You can rotate your pieces 90 degrees if you like.
I love this. This can also be used to effect; especially if the fabric is striped.

The Bias fold
If you are cutting the Carla rock of the Annie rock you can fold your cloth diagonally. This method is fine for allover prints and linen weave. The bias cut doesn´t alway use too much cloth. This layout is quite thrifty.

You can also use the Grid
If you want to get the best possible layout, use the grid layer under your pattern.
Print out the pattern in miniature, once with and once without the pattern pieces . Use the layer function to choose the size and also to print the back ground without pattern pieces.
If you are planning changes ,cut out and adjust your pattern in mini. If you want to lengthen it, or make it in contrasting fabrics, etc you can accurately map out how much cloth you will need.
Each square of the grid represents 10 cm.
So 10 squares = 1 m.
140cm = 14 squares.
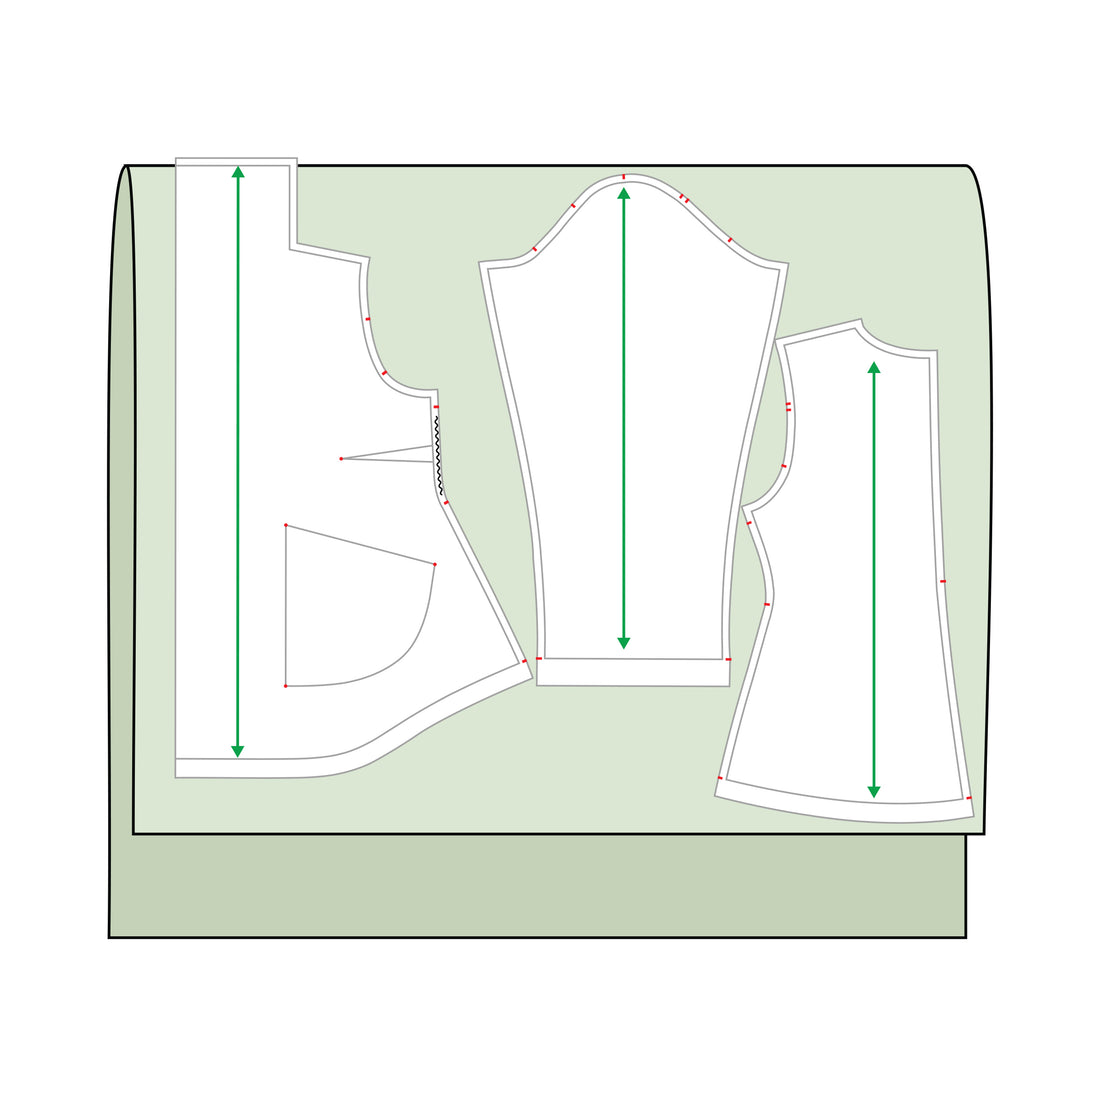
Here is an example of the Yes wrap layout in mini. In size 9, the front pieces are wider than 1/2 the cloth.The larger pieces are cut with a horizontal fold .The sleeves and side fronts are placed to be doubled up later and the long belt goes all the way down the side. This is also an economical layout.

I hope this will help you save time and fabric. Greetings
2 comments
Cat print one way fabric!😂
But of course.
This may be the most important information on sewing that I has ever seen! Epic! Thank you Lindy.